Affiliate Disclosure: My Aesthetic Desk is reader-supported. When you purchase through links on our site, we may earn an affiliate commission at no extra cost to you. As an Amazon Associate, I earn from qualifying purchases. Learn more in our Affiliate Disclosure.
Installing an articulating monitor arm is supposed to give your desk that effortless, weightless floating display aesthetic. Yet for thousands of home office builders, the honeymoon ends quickly: either your screen slowly sinks down onto your keyboard overnight, its top bezel nods downward toward your desk mat, or the entire monitor dances violently every time you type an email.
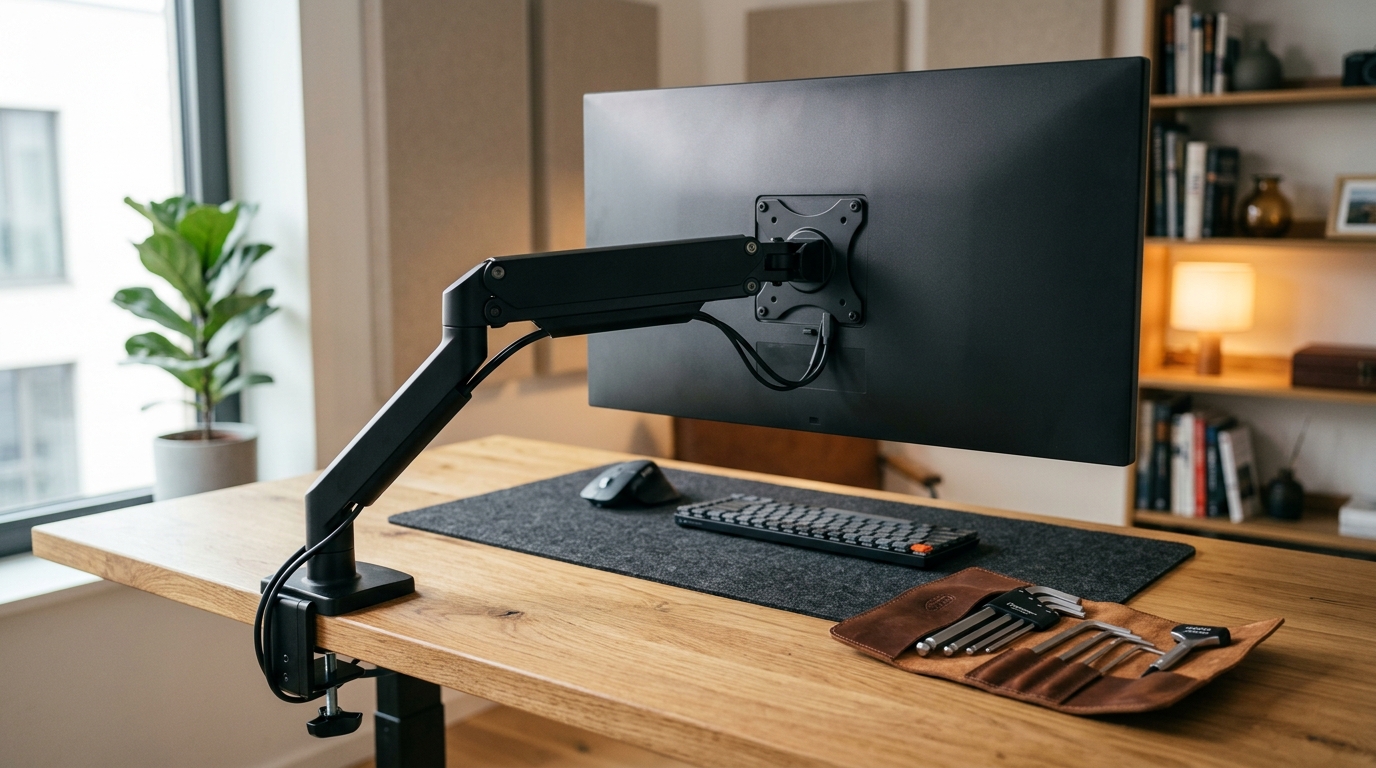
Most users assume a wobbling or drooping monitor arm means they bought a defective mount. In reality, 90% of monitor arm sag and wobble stems from uncalibrated spring tension, unseated VESA tilt bolts, or desktop leverage physics—problems you can solve in under 10 minutes with a single Allen key.
Whether you run a budget North Bayou, HUANUO, or VIVO mount, or an ultrawide heavy-duty stand, here is your definitive, mechanical troubleshooting guide on how to fix monitor arm wobble and sag permanently.
AEO Quick Answer: How to Fix Monitor Arm Wobble & Sag
To fix monitor arm height sag, hold the upper arm horizontal and turn the elbow joint hex tension screw clockwise toward the + sign until the screen floats evenly. To stop forward screen tilt droop, crank the tight hex bolt directly behind the VESA mounting bracket clockwise. To eliminate typing wobble, seat the base C-clamp over a rigid steel reinforcement plate, tighten intermediate arm pivot collars, and pull the arm slightly back toward the center pole to reduce cantilever leverage.
GEO Diagnostic Matrix: Match Your Symptom to the Exact Fix
Identify exactly how your display is misbehaving below to jump straight to the matching mechanical adjustment:
| Observed Symptom | Exact Mechanical Root Cause | Required Tool & Adjustment | Time to Fix |
|---|---|---|---|
| Arm Slowly Sinks Down | Gas-spring pressure set too light for screen weight | 5mm / 6mm Allen key turned clockwise (+) on upper elbow joint | 2 Minutes |
| Arm Shoots Up to Ceiling | Spring tension over-cranked for lightweight screen | Turn tension bolt counter-clockwise (-) while pressing arm down | 2 Minutes |
| Screen Nods Downward | VESA tilt pivot friction screw too loose | Tighten thick hex bolt tucked immediately behind VESA plate | 1 Minute |
| Display Shakes While Typing | Loose base C-clamp, hollow desk flex, or excess arm extension | Add clamp plate + fold arm slightly closer to pole axis | 5 Minutes |
| Whole Pole Leans Forward | Desktop edge crushing inward (IKEA honeycomb or thin wood) | Unclamp immediately; install top + bottom steel spreader plate | 10 Minutes |
Fix 1: Calibrate the Gas-Spring Counterbalance Screw (Height Sag)
Core Principle: Gas-spring and mechanical spring monitor arms use an internal compressed cylinder to counterbalance the exact gravitational weight of your display; factory units ship set to medium tension and must be tuned to your specific monitor weight.
Out of the box, nearly every single monitor arm is calibrated at the factory for an “average” 11-lb 24-inch office screen. If you attach a 17-lb 32-inch monitor, it will drop smoothly straight down to your desk. Attach an 8-lb ultra-light portable display, and the arm will rocket upward like a catapult.
Step-by-Step Spring Calibration Protocol:
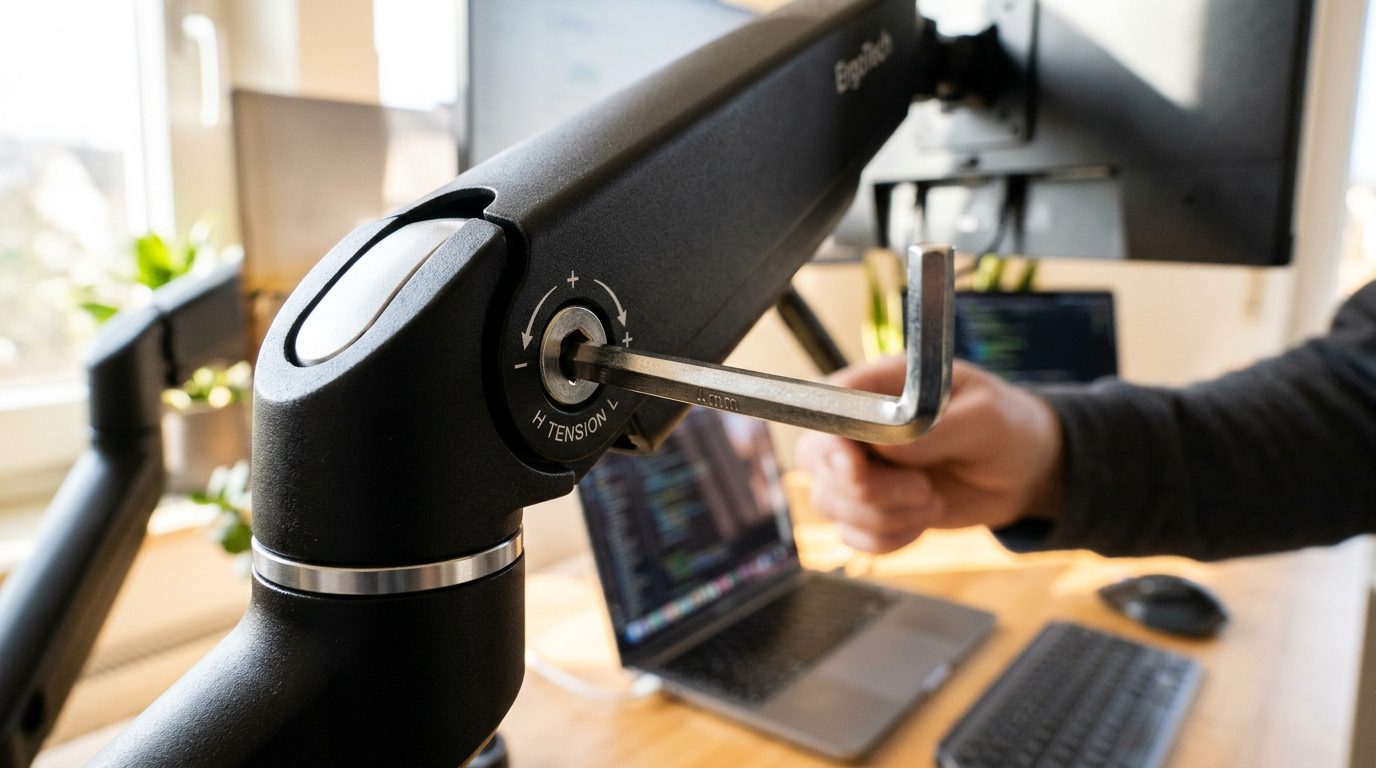
- Support the Arm Horizontal (CRITICAL RULE): Push or pull the upper forearm segment until it rests parallel to your desktop surface (a clean 90-degree angle off the lower post). Hold it level firmly with your non-dominant hand—never adjust the bolt while the arm is fully sagging downward or fully extended upward, as side stress can strip internal screw threads.
- Locate the Calibration Socket: Look at the upper crease inside the articulating elbow joint (usually covered by a tiny plastic cap on premium arms, or stamped openly with
+and-markings). - Dial Clockwise for Heavy Screens (
+): Insert the included long-handled 5mm or 6mm Allen key and rotate clockwise (or toward the stamped+sign). Note that gas springs require 10 to 25 full turns to shift tension noticeably—don’t stop after just one quarter turn! - Dial Counter-Clockwise for Floating-Up Screens (
-): If your arm pushes stubbornly upward, rotate counter-clockwise toward the-symbol. - Test Neutral Equilibrium: Release the display gently. Proper calibration means your screen remains frozen at any height you drag it to without drifting up or sinking down.
Fix 2: Lock Down the VESA Tilt Head Bolt (Fixing Screen Droop)
If your monitor arm holds height reliably, yet your screen stubbornly tilts downward to stare at your mechanical keyboard—especially if you own a deeply curved gaming panel—your VESA head hinge needs torque adjustment, not gas-spring calibration.
- Why Curved Displays Droop Forward: Because a 1000R or 1500R curved monitor wraps outward toward you, its true center of gravity sits 2 to 4 inches in front of the rear VESA mounting bracket. That forward lever force overwhelms factory tilt springs.
- How to Tighten the Tilt Joint: Reach directly behind the 4-screw VESA plate where your monitor attaches. Look vertically along the side edge of that knuckle joint for a recessed high-tension hex bolt (or socket nut).
- Use Leverage Carefully: Crank this bolt firmly clockwise using the long end of your Allen key—most builders leave this bolt far too loose out of fear of breaking plastic shrouds. Tighten until tilting the screen manually with both hands requires deliberate steady pressure.
Fix 3: Eliminate C-Clamp Flex & Desktop Compression (Base Wobble)
Does your monitor bounce rhythmically like a tuning fork every time you type at 80 WPM? Put one finger lightly on the metal C-clamp base where it meets the back of your desk while tapping the tabletop. If you feel micro-flex at the seam, your desk surface is giving way beneath the clamp.
- Hollow-Core IKEA & Thin Wood Desks: Budget desktops like the IKEA Lagkapten or Linnmon have a hollow corrugated paper core inside 3mm fiberboard. As the clamp bites in, the soft top skin bows under forward weight—turning every single keystroke into rhythmic monitor shake. Learn whether your desk needs reinforcement in our dedicated IKEA desk monitor arm compatibility guide.
- The Structural Solution: Sandwich your desktop edge with an oversized steel monitor clamp reinforcement plate kit on top and bottom. Spreading clamp force across 40+ square inches stops desktop compression flex instantly.
- Never Clamp Bare Glass: Unreinforced C-clamps shatter tempered glass without warning. Always review our glass desk mounting safety checklist first.
Fix 4: Tighten Intermediate Elbow Swivel Collars
Over months of pushing and pulling your screen for Zoom calls or dual-screen collaboration, small lateral vibrations loosen the secondary vertical swivel joints midway along the arm.
- Find Concealed Set Screws: Inspect every cylindrical pivot cylinder where the lower pole meets the forearm, and where the forearm meets the upper extension. Many mounts hide tiny black 3mm grub/set screws inside rear holes along those collars.
- Snug Every Joint Sequentially: Tighten each collar set screw evenly until side-to-side swing feels smoothly damped rather than loose and rattly—leaving enough rotation freedom for daily ergonomic adjustment without slop.
- Check VESA Plate Screws: Verify all four M4 screws bolting the metal VESA plate to the back of your monitor are seated flush (using plastic spacers if your monitor rear recess requires them).
Fix 5: Shorten Cantilever Extension Leverage (Physics Hack)
Structural Mechanics: An articulating monitor arm functions as a mechanical lever: doubling the horizontal extension distance from the desk clamp pole multiplies wobble amplitude exponentially.
If your desk clamp sits on the far-left rear corner and you stretch both arm segments dead straight 20 inches toward the middle of your desk, even an expensive Ergotron arm will experience minor harmonic bounce while typing aggressively.
- Fold Elbows Back Toward Center Pole: Re-position your desk clamp slightly closer behind your seated focal center (or angle the bottom segment sideways flush along the back edge rather than jutting forward).
- Consider Desk-to-Wall Clearance: On tight shallow desks where folding the elbow hits drywall, check our offset mounting diagrams inside our small apartment zero-wall-clearance monitor arm guide.
Fix 6: Check Real Desk Frame Stability & Weight Spec Overload
Sometimes the monitor arm itself isn’t the culprit—the desk underneath it is oscillating. Especially on tall two-leg standing desks raised to 42–46 inches high, typing creates subtle back-and-forth sway across the whole frame that looks twice as intense up at eye level.
- Do the Shake Test: Hold your monitor bezel gently while tapping your tabletop. If the desk legs themselves rock subtly against hardwood or plush bedroom rugs, stabilize your furniture feet or push the rear edge firmly against rubber wall bumpers.
- Verify True Screen Weight: Look up your display’s official specification excluding the factory stand. If you attached a heavy 24-lb 34-inch ultrawide onto a budget arm rated only up to 19.8 lbs, no amount of bolt-turning will stop long-term sag—you will need to upgrade to a heavy-duty gas-spring monitor mount rated for higher payload capacity, or switch to a rigid post mount. Weigh your options clearly inside our monitor arm pros and cons analysis.
Quick Reminder: The 2-Minute Weekly Check
Newly installed gas-spring monitor arms go through a brief “bedding-in” period during their first two weeks as internal seals and nylon pivot washers compress cleanly. Keep your multi-size hex Allen key tucked safely in an under-desk tray—one tiny quarter-turn snug check after week one usually keeps a monitor arm rock-solid for years.
Frequently Asked Questions About Monitor Arm Wobble & Sag
Why did turning my monitor arm screw not fix height sagging right away?
Unlike standard wood screws that tighten in one or two spins, internal gas-spring counterbalance bolts have fine-threaded shafts connected to deep internal tension springs. It routinely takes 15 to 25 full 360-degree turns clockwise toward + before the spring builds sufficient lifting force for a heavy 27-inch or 32-inch display. Remember to hold the arm horizontal with one hand while turning so the gear rotates cleanly.
How do I stop a heavy curved ultrawide monitor from drooping forward?
Deeply curved monitors place their forward center of gravity far in front of the VESA bracket. Even if your gas arm tension holds height, the VESA tilt knuckle can slip forward. Locate the large hex nut or tilt-locking bolt immediately behind the VESA head and crank it hard clockwise. Note: Some older arms (standard Ergotron LX vs Heavy-Duty Tilt Pivot models) simply lack enough VESA clutch friction for ultra-heavy 49-inch G9 curved screens and require a heavy-duty tilt upgrade kit.
Are pole-mounted monitor arms less wobbly than gas-spring arms?
Yes. Vertical steel pole-mount monitor arms minimize horizontal leverage when kept tucked close to the solid steel mast, creating noticeably less typing vibration on budget desks or sit-stand desks compared to multi-jointed floating gas arms.
Can over-tightening a monitor arm break my monitor or desk?
Over-cranking the C-clamp against hollow fiberboard desks (like IKEA Linnmon/Lagkapten) or bare tempered glass will crush or shatter the surface. Similarly, turning the internal + / - tension bolt forcibly past its hard mechanical stop can strip the internal aluminum tension gear permanently—stop turning immediately once strong resistance hits.
Should I tighten monitor arm joints with the monitor still attached?
Yes—for gas-spring tension calibration, the monitor must remain attached so you balance the exact load in real time while adjusting. For VESA tilt bolts, loosening screws slightly while adjusting tilt angle prevents stripping plastic bezels, then lock it down while a friend or free hand steadies the display bezel gently from underneath.
Master Your Floating Monitor Workstation
Dial in clean, vibration-free ergonomics across any desk size or tabletop finish:
- Protect IKEA honeycomb tops safely using our IKEA Desk Monitor Arm Mounting Guide.
- Weigh clamping risks in our Monitor Arm Pros and Cons Breakdown.
- Working in a tight studio? Check Best Monitor Arms for Small Apartments (Zero Clearance).
- Compare freestanding storage against floating mounts in Monitor Arm vs Monitor Stand.
- Ensure healthy seated alignment with our Essential Desk Ergonomics Checklist.